
How I create STAND OUT Edits in Lightroom Mobile
🛍️ Products Mentioned (5)

Curious how my photos come alive? This "editing tutorial" dives into the "lightroom editing" process, demonstrating how crucial it is for achieving desired looks. We'll explore various interfaces and techniques, making this a comprehensive "lightroom tutorial" for anyone interested in "photography editing". 😉 Watch my other tutorials here: https://youtube.com/playlist?list=PLBHeW5Ut6gg4Cs6B5gVPtzIjDh-bkXpWk&si=xlw6xUekrG5Vv3N3 Check out the preset here: https://payhip.com/b/RF1q9 Color graded using my custom LUT Get the LUT here: https://payhip.com/FENZIRFILMS Check out the Liquid Glass template for Davinci resolve here: https://payhip.com/b/Tx6ud Check out the DEHANCER plugin here: https://www.dehancer.com/shop/video/davinci_resolve Use code FENZ for 10% off on your purchase Thank you Dehancer for changing the way my videos look. Loving the constant support from you guys. :) ********************************************************** Do give me a Thumbs up and do give your suggestions in the comments. ********************************************************** Subscribe to my channel here: https://www.youtube.com/c/FenzirL *********************************************************** Where I get MUSIC for all my videos: https://share.epidemicsound.com/jrwa00 ((Free 1 month, download unlimited) - *********************************************************** Follow me on Social Network: Instagram : https://www.instagram.com/fenzirlathe... Facebook : https://www.facebook.com/fenzir.latheef Email : fenzirlatheef@gmail.com ************************************************* #lightroomedit #photoediting #lightroommobile
About This Video
Frequently Asked Questions
🎬 More from Fenzir Films
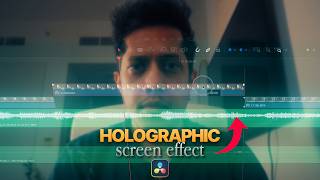
The invisible Screen Effect everyone is asking about
373 views

How to make TEXT MESSAGE Effect in Davinci Resolve
17.1K views

How to make TELEPORT Effect in Davinci Resolve
545 views

How to make BOUNCY TEXT Effect in Davinci Resolve
351 views

Advanced MOTION GRAPHICS Davinci Resolve
1.2K views

How to shoot CINEMATIC VIDEO with IPHONE
560 views