
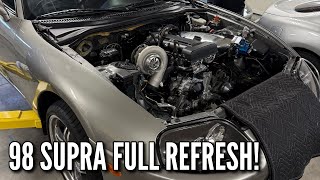
Mk4 Supra restoration pt.2 (Full Interior Removal)
🛍️ Products Mentioned (2)
Business Inquires Email: purefunctionsales@outlook.com Purchase RACE WORKS products Here: https://bit.ly/pure-function-tiperformance **** PURCHASE ALL PURE FUNCTION MERCHANDISE HERE **** http://www.pure-function.net/ SEND ME COOL STUFF! (If you want) Ryan Pure Function P.O. BOX 62 Rouzerville, PA 17250 ______________________________________ ***Social Media*** FACEBOOK: https://m.facebook.com/purefunctionen... INSTAGRAM: https://www.instagram.com/purefunction_/
About This Video
Frequently Asked Questions
🎬 More from Pure Function

Pulling My Newly Built 2JZ - Not on my 2026 bingo card
2.5K views
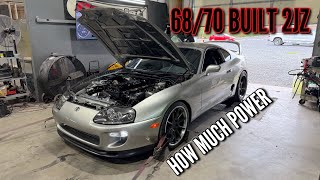
Franks 98 Quicksilver Supra - New OEM short block 7 PTE 68/70!
2.5K views
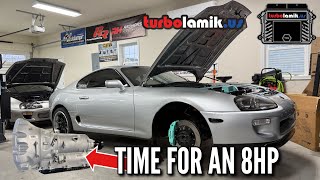
It Is Time For a Change - Turbolamik & 8HP Swap for MK4 Supra
5.2K views

Imports v.s. Domestics 2025 2JZ Racer Interviews
2.3K views
My Supra Heads to the Dyno & In Car POV driving
4.4K views
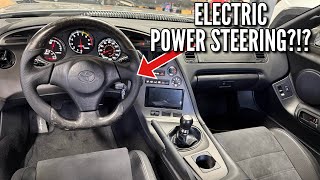
MK4 Supra with Electric Power Steering (best decision ever!)
3.3K views