Look Inside My Secret Composting Lab
🛍️ Products Mentioned (4)
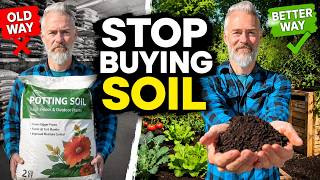
Here are the links: Azomite: https://amzn.to/3JiNfO1 Crane Scale: https://amzn.to/3L18Onq Rolling Sifter: https://amzn.to/3ZMIGRy GET 20% OFF A MONTY MONITOR WITH CODE: WINEBERRY23 https://montycompost.co/en-us/products/monty-for-composters I’ve come to the realization that the ability to improve and maintain high quality soil is just as and possibly more important than “gardening” skills. Too often gardeners think of garden soil, as a thing you grab a few bags of at your local garden supply. It’s basically the stuff we grow our plants in. In my opinion that couldn’t be further from the truth. A healthy and productive garden STARTS with the highest quality soil. To that end, I decided last year to radically improve my composting operation. I actually refer to what I built as, my composting laboratory….here’s a tour. Ratios Right off the bat, I try to monitor the ratios of my inputs so that I can put the beneficial organisms to work as quickly as possible, that’s why I have a hanging scale right in the middle of my lab. I also use my Monty monitor to help me make sure I’m nailing my ratios. OK NOW, One of the critical aspects of producing compost in volume and in a timely manner is “Surface Area”. This means that the smaller the size of the various inputs, you know the greens, the browns…the stuff like that. The better. So for my operation, step number one. Make it as small as possible. So after I’ve weighed my inputs it’s time to get chipping and shredding! Chipping and shredding So I use two tools for this stage. A large chipper for the bigger harder DRY and usually brown material. And a custom made shredder for the smaller sometimes moist and usually green material. Often I will add nutrient/adjunct during the shredding stage, so as to make the pile more uniform, so as to reduce the variability of hot and cold spots. This is also a good time to add Azomite. Mixing Once I have chipped and shredded my inputs, I try to mix them as much as possible. Composting Bin 1 Now starts the actual composting. I load up the first bin. Ideally the compost now heats up over the next week or so to a maximum temperature of about 140˚ f or 60˚c. This is the temperature when seeds and pathogens in the compost are destroyed but the beneficial microbes aren’t also cooked. Really, this is the stage that’s all about farming. You want these tiny organisms to thrive. Readily available food from lots of surface area as well as the sugars in the mix, will allow them to get to work quickly. This is when being able to accurately monitor the health of the bin with a Monty compost monitor really pays off. Additionally at this stage, I’m able to make use of the internal aeration system, Fire up the blower, plug it onto the port and give the whole system a nice boost of aeration. Bin 2 Once the adequate amount of time and heat have sterilized the mix, it’s time to sift it into the second bin. I open the front of the bin, and fork or shovel it into bin 2 SIFTER. I have Earthkeeping Green sifter mounted on a slight angle so that it’s easy to dumb the large chunks that still need to break down into a bin. Where I can either shred it further or add it to the bottom of raised beds as part of the Hugelkultur process. Bin 3 Since the compost in Bin 2 is already sifted I only need to move the material from 2 into 3 as a way of making room in bin 2 as well as turning the pile one last time. After the compost has had enough time to develop into the perfect chocolaty magic that we love so much…it’s time to move it into the garden. This is when the proximity to my greenhouse pays off, because it’s right next door. Now this video is less about the how to’s of composting, and more of a tour of my set up. Check out my other videos about the processes in more detail. In this video, I'm going to show you what's inside my secret composting lab! I'll demo some of the amazing composting techniques I use at my home, and explain some of the reasons why they work so well. If you're interested in learning more about composting, or want to see some of the amazing composting techniques I use at my house, then this video is for you! You'll learn about the importance of easy to use sifter placement, how to aerate your compost pile, and more. After watching this video, you'll have a a better understanding of how to compost at home!