New NAS Build, Part 2
🛍️ Products Mentioned (2)
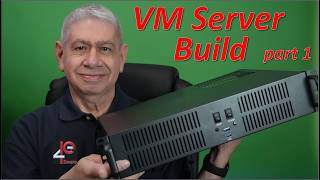
4U Server Case Rack Mount, 7X3.5 + 2X 5.25 HDD, 4U Server Chassis with 3 Pre-Installed Fans | 8 HDD Bays, Security Lockable Computer Cases for Home Lab NAS Streaming PC
RIITOP 2 Ports USB 3.0 Female Back Panel to MB 20pin Header Connector Cable Adapter with PCI Slot Plate Bracket 1.5ft [2-Pack]
This video illustrates Part 2 on y New Network Accessible Storage (NAS) Build. In this episode, I will Show how I have modified my NAS Case to provide USB 3.0 connections to the front on Network Rack. Thanks for watching. Video Time Codes (click to skip directly to a desired section of the Video) 00:00 Introduction to my New NAS Build, Part 2 04:06 Disassembling the NAS Case to allow for Modifications 06:32 Modifying the NAS Front Panel to Include Two USB 3.0 Connectors 07:37 Using a Template and Drill to Start a Rack Mounted Case Modification 08:33 Drilling the Initial holes for a USB 3.0 Bracket 08:55 Using larger Drill Bits to expand the USB 3.0 Bracket holes 09:44 Finishing the USB 3.0 Bracket opening with a Dremel tool 10:25 Installing the USB 3.0 ports to the front of a rack-server case 11:09 Adding an cover to a Rack Case Front panel switches and LEDs 13:20 Resembling a Modded rack-mount PC case 17:39 Conclusion of my New NAS Build, Part 2 Note: I have NOT received any sponsorship for using the products shown in this video. However, as an Amazon Associate I earn from qualifying purchases, when these links are used: 4U Server Case Rack Mount, 7X3.5 + 2X 5.25 HDD, 4U Server Chassis with 3 Pre-Installed Fans | 8 HDD Bays, Security Lockable Computer Cases for Home Lab NAS Streaming PC https://amzn.to/4u7STI4 RIITOP 2 Ports USB 3.0 Female Back Panel to MB 20pin Header Connector Cable Adapter with PCI Slot Plate Bracket 1.5ft [2-Pack] https://amzn.to/4sqJUjA Please subscribe to my Channel, and click ‘Like’, if you find this video useful. I will endeavor to answer any and all questions posted for any of my videos as quickly as I possibly can. If you have any questions or suggestions, I can be reached on Email at: PE4Doers@gmail.com , or on Twitter (X) @PE4Doers, or Instagram @PE4Doers. Or on a more professional basis, through LinkedIn at: https://www.linkedin.com/in/davidrrivera/ #NewNASBuild #PE4Doers #NASCase Modifications