
Inspecting And Reviewing My Van Conversion | Van Build Mistakes | Tiny Camper Van Conversion
🛍️ Products Mentioned (10)
written version on my website
Entire van conversion playlist
Support the channel
Music via Uppbeat, sign-up through my affiliate link here
Van carpet
Thermawrap bubble wrap insulation
NOVOO portable power generator/battery pack
USB ceiling lights
Recycled plastic loft insulation
Rubber U-channel edge trim seal
It’s time to do a van build review and inspect the functionality of my van conversion, mistakes and all, after over a year of days out, camping and adventure. In this van conversion follow-up, I go through the different elements of my van build and share what I would change about my van. I’ll also be removing my recycled plastic bottle insulation to see if it’s insulating correctly or whether it’s damp and covered in mould. 🔔 Please SUBSCRIBE to my channel, thanks! 🔔 🔥 Entire van conversion playlist: https://bit.ly/2ZewxLt 📸 Instagram: https://www.instagram.com/yogi.the.van 🚐 Check out the written version on my website: https://thetinycampervan.com/2021/10/28/inspecting-and-reviewing-my-van-conversion/ ☕ Support the channel: https://www.buymeacoffee.com/LensOfJames 🙏🏻 🎶 Sign-up to Uppbeat through my affiliate link here: https://uppbeat.io/?as=lensofjames Affiliate links: 👉 USB ceiling lights: https://amzn.to/3ZdYHz0 👉 NOVOO portable power generator/battery pack: https://amzn.to/3Zbsdpg 👉 Thermawrap bubble wrap insulation: https://amzn.to/408FYGB 👉 Van lining carpet: https://amzn.to/3ncNHEP 👉 Recycled plastic insulation: https://amzn.to/40vbqhM 👉 Rubber U-channel trim: https://amzn.to/3Zbr1Ci 0:00 - Intro 0:55 - Reviewing the van 4:35 - Checking the insulation 7:04 - What would I change? --- Let's start with the carpet. I’m so pleased I carpeted the walls, instead of using heavy, space-consuming wood which would have been screwed into the van walls. The smoke grey finish hides marks, & the carpet itself actually acts as an insulator, reducing condensation. I stuck carpet over foil bubblewrap insulation in some problem areas - no problems in these areas either, & I’m pleased to say that the carpet still looks as good as the day I put it in. I get asked about rubber trim around the doors a lot & whether it’s still stuck well. I did a lot of research into adhesives prior to doing the doors, & the rubber is still solid. Onto the floor, & again no real problems. I have made a few marks & scratches on it, but other than that it just needs a good clean! The bed has been brilliant, & for those who don’t know I made it in 3 sections so I could fit my surfboard through the centre of the van. I changed the draw from metal sliders & a peg in the leg to a couple of wooden rails with a stop. I also fitted a bolt to the far side of the bed, attaching it into a screw thread in the van. With the addition of the 2 turnbuckles, it’s solid. Moving on, the curtain is still firmly in place, the headliner is still free from mould, & the storage box is working perfectly. The table is so sturdy, & it’s large enough to eat lunch or dinner on. I added some jars to store some of the most essential items we need when out & about - coffee, snacks & charging cables! I keep a small gas stove, folding solar panel & carbon monoxide detector there. The battery has been brilliant & it’s great having access to the sockets without having to pull the table down. I swapped out the AAA ceiling lights for some USB chargeable ones, meaning I can easily charge them from the battery if needed. Oh, & I also gave the ceiling some varnish to protect it from condensation. The fairy lights are probably one of the most used features when camping, transforming the van into a really cosy space. I’ve previously removed one of my ceiling plywood panels to see how the foil insulation was doing, & I was pleased to see that it was keeping condensation away, but the soft loft insulation, which is made from recycled plastic bottles, is a different matter. The first area I checked was the column by the back doors. Before insulating the van, I knew condensation gathered here so I was keen to check it out now. I’m really pleased to see that the insulation is still dry & clean, & so is the inside of the cavity. I chose the next area because had left the foil insulation exposed behind the door card, which I now thought would be easier to cut through & patch back up. After removing the door card, I sliced into the foil insulation & created enough space to pull some of the loft insulation behind it out. What a relief - the insulation looks as good as the day I put it in. Thinking about it, this insulation has now seen 2 damp winters so I’m pretty pleased about this. Inside the cavity it looked as good as when it was last sealed up. Using a bit of foil tape I could seal up the bubblewrap insulation, & then replace the door card. It’s nice to know that things are doing ok on the inside of the walls of the van & that someone with no experience can undertake a van conversion. 🔔 Thanks for watching and if you’ve enjoyed this video, please LIKE and SUBSCRIBE! 🔔 #Vanlife #NissanNV200 #LensOfJames DISCLAIMER: In this video, I am in no way stating that this is the proper way to undertake the conversion of a van, however after research and experience using the van, I believe this to be the way that is best suited to my van and the way I intend to use it.
🎬 More from Lens Of James

70mai A810 Lite Review | Best Budget 4K Dash Cam in 2026?
1.2K views

Android Auto Broken After Update? Here’s the Fix That Actually Works
6.3K views

Carpodgo T3 Pro vs Mini – Best Portable Apple CarPlay & Android Auto Screen?
4.2K views
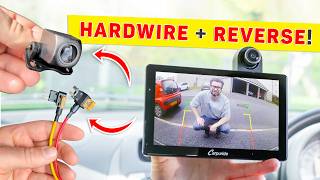
How To INSTALL CarPlay Screen + HARDWIRE It & Add A REVERSING Camera (Step-by-Step)
3.0K views

Redtiger F7NA Review: The Best Budget 4K Dash Cam In 2026?
1.1K views

Carpuride W703 Tested: The Ultimate Budget CarPlay Screen For Older Cars?
2.0K views