
Fuse Bead Portrait Basics | Perler Bead Portrait Basic | Multimedia Portrait | Iron On Bead Portrait
Join this channel to get access to perks: https://www.youtube.com/channel/UCXdHGqFrw10MTWBAHMBZCdQ/join #perlerbeads #perlerbeadart #fusebeads Learn how to make peeler bead portraits. Materials used in the video below: 1. Fuse beads/ perler beads 3mm size 2. 50x50 peg board for 3mm beads 3. Curved tweezer or forceps 4. Ironing paper or simple butter paper will also work 5. Shadowbox frame to host the portrait 6. Iron with temperature control In case of any questions please leave a comment or reach out to me at crafts.genie@gmail.com Happy Crafting, Genie Crafts
About This Video
Frequently Asked Questions
🎬 More from Genie's Art & Crafts

GENIE CRYSTALS - AI Powered Crystal Portrait Template Generator | Rhinestone Portrait Template
10 views
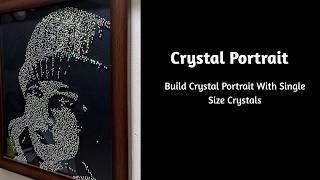
Crystal Portrait Same Size Beads | Random Placement Crystal Portrait | Crystal Portrait Basics
791 views
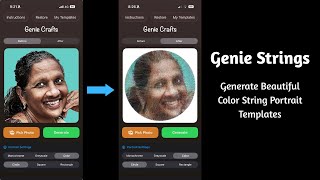
GENIE STRINGS - String Portrait Template Generation App | Custom Templates for Thread Portrait
941 views

Launch announcement - GENIE STRINGS - thread portrait template generation app from Genie Crafts
1.7K views

Sneak peak into the exhibition - WTC Cuffe Parade. Please come and visit @TheHaatofArt-or9uf
300 views
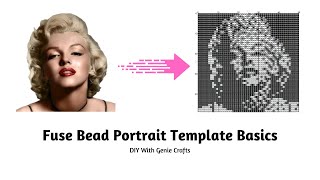
Fuse Bead Portrait Template | Perler Bead Portrait Template Basics | Multimedia Portrait Template
1.4K views