Is this your channel?

Revelry
I link the Perfect Puff Beanie pattern on Ravelry so you can easily save it, queue it, and come back anytime. It’s a simple way to keep all your project notes in one place while you crochet along with my how-to guide.
Buy on Ravelry
You'll be taken to Ravelry to complete your purchase.
Pros
- +Easy place to save and organize patterns
- +Convenient access to the Perfect Puff Beanie listing
Cons
- -May require a Ravelry account for the best experience
What Lisa's Pine Notes says
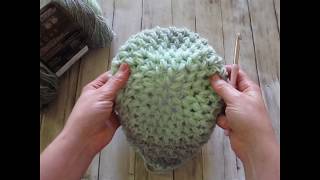
“[Music] [Music] [Music] good morning my name is Lisa and welcome to Lisa's pine notes for those of you who are new please note that pine notes is a crochet channel I have been crocheting for a little over two years now and I want to share with you my perfect puff stitch beanie it is a pattern that I placed unravel II and of course I want to call it a how-to guide this is perfect for beginners it is fun and we are using scarfy yarn which is a bulky weight yarn in the color mint silver and it is a bulky size yarn so if you use a different size yarn or a different type yarn you may not get the results we're getting today also I am using a size K hook right here which is also a six point five millimeter now with that said I invite you to go to my website pine notes comm where you can click through from the main page to get your free download of the pattern or go to my revelry account which I will link below so let's gather our supplies and meet me back here we'll get started to get started on our perfect puff beanie we're going to work it from the top down and that means this little flower right here will be increased until a certain point and then we'll stop once we work our way halfway down we're going to reverse our project and crochet in the opposite direction so when you flip the rim of this perfect puff beanie all your stitches are going in the exact same direction and it's a fine point and of course on the pattern I point this out with a ruler but these are going that way and these are going this way you flip this up and they're all going the same way besides a band happens to give extra warmth and you guys know I'm from Ohio so I'm all about the extra warmth and let's get started with the little what I call the flower have your yarn and your crochet hook and let's work a Magic Circle now if you can't do a magic circle because you're new and I couldn't do it for a long time you can just chain 4 and connect and work into that that's fine from here we're going to slip stitch down to connect and then dive right into the middle of that circle and pull up a loop yarn over now you've got three loops on the hook dive over again that's four this is why in the pattern it's called a p4s for a puff four stitches so one two three four puff stitches can be made with many many different numbers of loops on your hook it all depends on what the pattern calls for you see there after a yarn over I pulled through all four I'm going to yarn over again and chain one here we go dive into the center of that loop pull up two loops on a hook yarn over three loops on the hook yarn over after you dive through the middle four loops on the hook and pull through now this is very very tricky working into the center so take your time and do that and you will get a little flower looking pattern like this and we're going to do it for six one two three four five and six so join me back here when you have your little puff flower made your puff flower should look like this when you pull the tail end of this tight now you're already in a circular position because you started with a chain fourth that's fine what we're going to do with that last chain is simply slip stitch it into the top here and pull through and pull through that's a that's a slip stitch now pulling that slightly apart between each puff stitch there is a space from here on out we are working in that space so with that loop on your hook you're going to dive right in the middle of that space and pull up a loop for two yarn over three insert hook again pull up a loop and you've got four yarn over pull through and single stitch now we're increasing so in that exact same spot you were dive right back in pull up a loop two loops on the hook yarn over three loops on the hook dive into the same stitch yarn over pull up a loop that makes four yarn over one more time to pull through and single stitch to close that is all in the first stitch moving on to the second space here dive in pull up two loops on the hook yarn over three loops on the hook dive in again you yarn over pull up four loops on the hook to make the puff pull through chain one and remember we're increasing so in that exact same space you're going to perform that all over again this is one of my favorite new stitches that I've learned and we're going to do that all the way around now you may also want to secure the back of your puff so it's a little bit tighter and doesn't come apart like mine was all right meet me back here when you've done all your double puffs in those spaces and you now have twelve puff stitches all the way around and what we're going to do is simply slip stitch once again right into the top of their very first puff which is just pull through and pull through and I am going to mark that very space which is very important so you know where you're stopping and starting point is because we're going to work in the round after a little bit we're not going to be slip stitching anymore so mark your space and then we are on what I call the one two three four increase now if you watched my tutorial on the bun beanie hat I did earlier this year that simply do one stitch in the first space do two stitches do one space do two stitches that your first round till you get back to the safety pin your second round will be the one two this would be two stitches and then an increase so that's how I remember how to increase use whatever pattern or increase method you're familiar or comfortable with but that's what we're doing today so with that said I am going to go in that first space right here and just do one so insert I've got a loop on the hook here insert pull up a loop two loops yarn over pull up a loop for I know that little safety pin I love safety pins for stitch markers all right now our first puff has been made in that next space is your increase so dive right in two loops yarn over three four loops pull through seal that same exact space two loops on the hook yarn over three pull up four and there you go so we have a single puff a double puff pull that slightly apart so you can find that space dive right in for your single puff here we go yarn over pull through single to seal and in that next space is your double for your increase so we can grow the size of this hat pull through seal and dive in again here we are one two three four pull through seal and tugging gently apart right there another single so a single and a double a single and the double meet me back here when you reach your safety pin and you've just done your single double single double single double all the way around you're ending on a double and right here I removed my safety pin so I can just slip stitch right into and pull through and let's insert that again so we know where our around that's probably one of the last times will slip stitch and if you need to slip stitch to make yours work that's fine I call these high how-to guides or patterns they're just like recipes when you cook or bake what you do is up to you if you don't like a lot of salt in your cooking you're not going to use salt for example the same thing with crochet do what makes you comfortable and on to our next round this time we're doing single Single Double oh I feel like I'm at the poker house so single pad for loops on the hook single pull that gently apart and find that seal it up and back in that next space so I've got to this one we're going to do double so I got a single Single Double and I twist it up my yarn so we'll do that again single Single Double right there and diving okay single Single Double pull that gently apart find your space pull up single single Delvin seal it off but dive right back into that space for loops on the hook seal it off and continue with your single single W and meet me back at the safety pin and welcome back you've done single single double single single double all the way around for your increases you've ended on the double and this time instead of slip stitching we are going to go ahead and work a single right into that very next one but I'm going to put it down for a second that's where I started so I want to remember where I end when we go up to the next round now remember I was telling you one two three four this time three singles one double so we've already made one let's go into our space here's our third coming up remember some of these are a little tighter so gently pull them apart to find that space there's my third and this one will be my double glowing right in the middle four loops on the hook seal it off going right back in that space four loops on the hook and sealing it off alright so we have our one two three singles and a double do this increase round and meet me back here back you just completed our last round that we're going to do here I'm going to talk about circumference and some great guides to help you finish off your hat what I'm talking about is the circumference you need right here from here to here for the crown of your hat there are many great guides out there to off the top of my head that I can think of are my key from the crochet crowd and Claire from Bob Wilson both with years and years of experience on doing this I am going to link the guides down below and you are going to do the crown of the hat to the measurement that you need and then you're going to work just regular single puffs all the way up until you reach the length of hat that you need and yes they even give you the length of hat that you need per size so I am going to link that below and you do your increases your increases here as much as you need to and then start doing just single puffs all the way around and meet me back here when you're done I'm going to continue on I've done all my increases that I needed here what I want to show you is the magic part of this hat that I explained at the beginning of this video I love a nice thick fold up hat and in order to achieve that here we need to make the brim but when you fold it up I wanted the puffs to go in the same direction that we are doing right here so on your last stitch this time I am going to have you chain one up and turn your hat turn your hat and then go in dive right into that middle yarn over pull up for remember p4s for puff stitches right here close that on top and then start working your magic on this hat so you can have the perfect puff hat for your use and enjoyment and there you go now do that as many as you want I believe I did four inches online so when you fold it up those puffs are going to be facing the exact same way so that's what I mean on the instructions by turn your work and continuing your puffs all the way around well as always I appreciate each and every one of you out there thank you for liking watching and subscribing to my channel this is Lisa from tiny notes take care [Music]”