Is this your channel?
Lightburn
LightBurn is what I use to build the design, split layers for cut vs engrave, and run the job once the xTool F1 is connected. The Devices > Import workflow makes it easy to load the F1 profile, and features like Fill vs Line and the Frame button make setup and placement really straightforward.
Buy on Lightburnsoftware
You'll be taken to Lightburnsoftware to complete your purchase.
Pros
- +Device import makes xTool F1 setup quick
- +Easy layer control for cutting (Line) and engraving (Fill)
- +Frame feature helps confirm placement before starting
Cons
- -If Filled Rendering isn’t enabled, filled engraves can look like outlines in preview
What Go Laser Go says
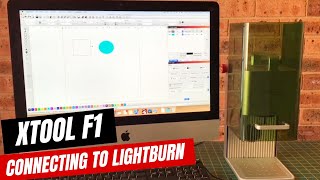
“in this video I'm going to show you how to connect your X tool F1 to lightburn so the first thing we need to do is come over to the side of your F1 and you connect the included USB cable into the side there and then you take the other end of the cable and connect it to your computer now over in lightburn we need to click on devices and click on the import option and what we need is a little file that you can get from the extol website and I'll leave a link to that below but you just click on that open it and it'll automatically load what you need into light bur so you can see it listed there now so just click okay and we're ready to go so all we need to do now is come down to the drop down on the side there and select X tool F1 okay so now we're connected and you can see on the screen immediately the grid has changed now to the format needed for the F1 now I'm just placing the working plate on the surface there because I'll be cutting and I want to protect the surface and I'm also placing the material I'm going to be using and this is a piece of 3 mm ponia wood now you may also notice that there are two dots on the screen a red and a blue there and we need to merge those together so what we need to do is come up to the side of the F1 and turn the dial until those two dots merge together now back in light bur we want to import our image or in my case create one from scratch and I'm just going to be creating a very simple monogrammed emblem so I'm selecting the ellipse tool from the sidebar and drawing an oval shape on the screen and you'll notice as I do this that it immediately creates a layer over here in the cuts and layers panel I'm also going to be creating some text I'm going to click on the text tool to create my monogram now what I want to do here is engrave the text and cut the shape but you can see that it has placed the text and the shape in the same layer and I need to separate the two so in order to do that I need to select the text and then come down to the colors palette and select one of those colors now you'll notice as soon as I do that that we now have two layers in the cuts and layers panel so what I'm going to do now is I'm going to move the text over to the shape and then I'm going to center it and now I can select the mode for each of these layers so because I want the oval shape to be cut I'll leave that as is as as line that means it's going to cut and the letters I want to engrave so I need to change that to fill now you can see that as I do that that the text is filled with color now if yours doesn't fill with color like this and instead shows an outline just come up to the settings option at the top menu and make sure that filled rendering is selected now we need to enter the speed and power settings so I've come over to the X tool website and they have a table of material settings which is really handy so just make sure when you use this table though that you select X tool F1 and then the type of material you'll be working with which in my case is wood so I will be using and then enter your settings so in my case I need to enter 300 speed and then 100 power and then I can click okay so once we've got all that done we can click on the frame button and we do that so we can see where the image is going to be engraved on and you'll notice that I move the wood around until I had it as close to the corner as possible so that I reduce the amount of waste but once I was happy with the position I just needed to click on the start button and away it went at this point it's always a good idea to close the protective shield on this but in my case the wood was hanging over the edge so I didn't have that option so I just use my safety glasses you can see how well this cut and the engraving came out great so the settings were pretty spot-on for what I wanted to achieve here now there's just something I want to mention here normally I prefer to engrave first and then cut if you cut first there's always the risk of the wood moving or falling out of place which may affect the engraving I just basically forgot to do this but for ly it worked out perfectly so there you go that's how you connect and use your X tool F1 with lightburn so thank you for watching I hope you enjoyed this tutorial and we'll be making more X tool F1 videos in the future so stay tuned”