
Clone Stamp Tool Basics + 3 Key Checks to Fix Issues | Photoshop Tutorial
🛍️ Products Mentioned (2)

🔈 Note: This is one of my early videos, and the audio is lower than ideal. Please turn up your sound for the best experience—and thank you for sticking with me as I improve! 🙌 If you're struggling to get your clone stamp tool to work, you might be missing one of the small details shown in this video. This video is an overview of how to use the Clone Stamp Tool and gives specific tips on where your settings might be causing you frustration. For instance: *1) Did you select the correct layer sampling options? * Your choices are: • Current Layer • Current & Below • All Layers *2) Did you SET where you're sampling from in your image? * You have to use your keyboard and mouse to set the target. Hold Alt key (Windows) or the Option key (macOS) on your keyboard and then click with your mouse on the PhotoShop artboard/image where you want to start cloning from. You'll see your mouse pointer turns to a target icon. Now when you use your clone brush, you'll see a little copy of where you're copying from too. *3) Are you stamping on the correct layer? *Don't forget to look at your layer order. Make sure your intended editing layer is selected (highlighted) in your Layers Window. AND - I'm sorry about the low volume! I'll fix that next time! *Key Commands - Mac and PC* Press *Option* (Mac) or *Alt* (Windows) and click to define your source point with the Clone Stamp Tool. *Time Stamps* 0:00 Learn how to find the Clone Stamp Tool and Basic Use 2:00 Issue 1: Define the Clone Stamp Source 2:45 Flattenend Image (like a jpg/png) - Destructively using the Clone Stamp Tool 3:20 Suggestion: Work on a blank layer when manipulating with the Clone Stamp Tool 3:30 Check Sample Layer - especially when you're working on multiple layers. You might be sampling from a blank layer! 4:20 Tips for making the clone stamp smoother (change hardness) 4:50 Smooth out clone stamp layers with a layer mask 5:20 Check these 3 things to fix Clone Stamp: Set sample location, set layers sampling from, try not to permanently destry your source image More Photoshop Videos: https://youtube.com/playlist?list=PLHuSXVFEXJ2Jh5cUqR4EbSjVZRCuCuOou&si=b59ILlElAhr1b9JE PhotoShop How To articles: https://designertofullstack.com/tag/photoshop/ Follow along using this exact photo. You can downlad this photo by Melike Benli from Pexels: https://www.pexels.com/photo/back-view-of-groom-and-bride-with-tuff-rock-formations-and-hot-air-balloons-in-sky-8633368/ #photoshoptutorial #adobesoftware #graphicdesign
🎬 More from Kelly Barkhurst: DesignerToFullstack
InDesign Tutorial: How to Update "Section" Headers & Marker Variables
103 views
Why You Can’t Edit That! InDesign Master Pages & Linked Files Explained
107 views

How to Generate 60+ Meta Descriptions in Minutes: Wix Studio & Gemini AI
44 views
WordPress Community Q&A: Desktop vs. Mobile Layout Alignment - Restaurant Menu
22 views
Improve Your Webflow SEO in Seconds: The "Convert To" Heading Trick
44 views
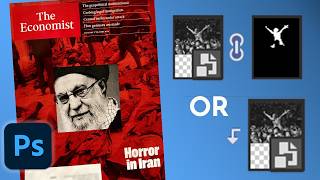
Photoshop Layer Masks vs. Clipping Masks Explained: How to Recreate The Economist Magazine Style
66 views