
Cracked Render? Watch This Before You Start Repairing
👇 See our other rendering videos https://youtu.be/AIDwIQQ6VA8 https://youtu.be/QCkjlpqPCUw https://youtu.be/wNsB8FIuy2w https://youtu.be/UT_8vpsMuCU ____________________________ 🛠️ Tools & Products Used from @ewistore Topcoat Primer (EWI-333) - 7kg 🛒 https://ewistore.co.uk/shop/external-wall-insulation/top-coat-primer-7kg/ Render & Sponge Floats 🛒 https://ewistore.co.uk/product-category/external-wall-insulation/render-sponge-floats/ ____________________________ Summary 🧱 Identifying the Problem Roger examines a gable wall that needs redecorating, noting minor cracks likely due to slight structural movement during a previous extension. The render isn’t loose, but there’s some texture variation and minor cracking. 🔧 Preparation Steps Cracks are opened up using an angle grinder to inspect their depth. Roger determines the cracks are only in the render, not the brickwork. He uses a fungicidal wash to clean the wall and then applies a primer from the EWI shop to ensure adhesion. 🧪 Repairing Cracks A mix of sand, cement, and SPR (a rubbery bonding agent) is applied to the cracks. This mix remains flexible, allowing it to withstand minor movements without re-cracking. 🧰 Application of Silicone Render A 1.5mm silicone render is applied with a trowel. This product is known for its flexibility and durability. It’s essential to apply thinly and work systematically to maintain a wet edge, preventing visible joins or dry spots. 🌤️ Environmental Considerations Roger notes the importance of temperature: hot days make it hard to manage the render. He aims to work in moderate conditions and mentions that optimal weather for such work is around 18°C. 🤝 Collaborative Effort On day three, Roger is assisted by Ben to maintain a continuous application. They use a plastic float to smooth the render and fill gaps. Small adjustments, like a light spray of water, help maintain the workability of the render. 🧾 Material and Cost Efficiency Roger highlights that two tubs of render were sufficient for the entire gable wall, including areas around windows. He points out that the cost is comparable to masonry paint, making it an economical choice. 🏁 Final Result and Reflections The project concludes successfully. Despite minor flaws like dry edges, the finished result is visually acceptable. Roger invites viewer feedback and discussion in the comments. ========================================== #homeimprovement #rendering #diyprojects 👇 SUPPORT SB - BECOME A MEMBER https://www.youtube.com/channel/UC9GdB6vG6m6cDAwrTAWXgyg/join 📪 JOIN OUR NEWSLETTER http://skill-builder.uk/signup 🛒 SEE OUR FAVOURITES ON AMAZON https://www.amazon.co.uk/shop/skillbuilder 🎧 LISTEN TO OUR PODCAST https://blubrry.com/skillbuilder/subscribe 🎬 OUR VIDEO LIBRARY https://www.youtube.com/@SkillBuilder/videos 🔗 SEE EVERYTHING SB ON LINKTREE https://linktr.ee/skillbuilder https://www.facebook.com/skillbuilderchannel https://www.tiktok.com/@skillbuilder https://www.instagram.com/skill_builder (As an Amazon Associate, we earn from qualifying purchases) ================================== OUR FAVOURITE CHARITIES 👷 BAND OF BUILDERS https://bandofbuilders.org ⛯ THE LIGHTHOUSE CHARITY https://lighthousecharity.org 💧 CHARITY WATER https://www.charitywater.org
🎬 More from Skill Builder
The Lead Was Fine — The Timber Wasn't | Slipped Hip Repair
12.7K views

Peeling Plaster? Don't Panic, Watch This
9.0K views
Before You Replace a Flat Roof, Try This
149.6K views
The Leak Nobody Could Stop
37.0K views
Build a Feather Edge Fence Like a Professional
18.3K views
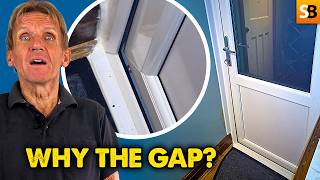
Your uPVC Door Might Just Need This Simple Adjustment
22.4K views