
Granny Ripple Stitch Tutorial | Perfect for Baby Blankets!
🛍️ Products Mentioned (4)
Get the Written Pattern PDF here → https://payhip.com/b/6Xfer Free pattern included below in the description 👇🏻 In this video I share how to do a very simple version of a granny ripple stitch plus how to straighten the edge if you don't want the points. This is a great stash buster project or if you have a self striping yarn you've been wanting to try. Yarn and Hook: Weight 4 Cotton Yarn "I Love This Cotton Yarn"- Hobby Lobby 4 mm hook https://amzn.to/3AplMoo (you don't have to buy the set, they are also sold separately) Susan Bates Finishing Needles https://amzn.to/3SOv6dQ Favorite Stitch Markers https://www.anrdoezrs.net/click-100216280-13492653?url=https%3A%2F%2Fwww.michaels.com%2Fproduct%2Fthe-crochet-dude-stitch-marker-rings-10233530&cjsku=10233530 Affiliate links 👆🏻 🧶 Pattern Foundation Row: Ch a multiple of 25 + 3. 📌Tip: Place a stitch marker every 25 ch to mark where each ripple “point” begins. Row 1 (Setup Row): CL in 6th ch from hook (skipped chs count as dc and ch-2), *[Sk 2 ch, CL in next ch] 3 times, (ch 2, CL) in next ch (peak made), [sk 2 ch, CL in next ch] 3 times, sk 5 ch, CL in next ch (valley made); rep from * across. On final repeat, end after CL in next 3 sps and 3 ch remains. Sk 2 ch, dc in last ch, turn. Row 2: Ch 3 (counts as dc), sk first sp (below base of ch), *CL in next 4 sps, (ch 2, CL) in ch-2 sp (peak made), CL in next 3 sps, sk next CL sp (valley made); rep from * across. On final repeat, end after CL in next 3 sps. Sk CL and dc in top of beg ch-3. Rep Row 2 for pattern. 🎨 Color Changes (Optional): For stripes, change colors every 2 rows or as desired, using your preferred joining method. Optional: Straight Edge Finish To straighten the wavy top or bottom edge: Side Slope 1 (Right) : Row 1: Join yarn with sl st in 1st st. Ch 3, CL in next 3 sps, dc in ch-2 sp of peak. Ch 3, turn. Row 2: CL in next 2 sps, dc in last sp. Ch 3, turn. Row 3: CL in next sp, ch 3, sl st in last sp. Fasten off or sl st over to next peak ch-2 sp. Special Stitch for Valley Fill: 6-dc-Cluster worked over 2 spaces (6-dc-CL) [Yarn over, insert hook in first sp, yo, pull up a loop, yo, draw through 2 loops] 3 times (3 partial dc in first sp), [yo, insert hook in next sp, yo, pull up a loop, yo, draw through 2 loops] 3 times (3 partial dc in second sp), yo, draw through all 7 loops on hook, ch 1. 📝 Important Note: In Row 1, each 6-dc-CL is worked across 2 spaces — the ones on either side of the valley space (the space that is skipped). In Row 2 and 3, the 6-dc-CL is worked over 2 adjacent spaces. Valley Fill: Row 1: Join yarn with sl st in ch-2 sp of peak. Ch 3, CL in next 2 sps, 6-dc-CL, CL in next 2 sps, dc in last sp, ch 3, turn. Row 2: CL in next sp, 6-dc-CL , CL in next sp, dc in last sp. Ch 3, turn. Row 3: 6-dc-CL, ch 3, sl st in last sp. Fasten off or sl st over to next peak ch-2 sp. Side Slope 2 (Left) : Row 1:Join yarn with sl st in ch-2 sp of peak . Ch 3, CL in next 3 sps, dc in last sp. Ch 3, turn. Row 2: CL in next 2 sps, dc in last sp. Ch 3, turn. Row 3: CL in next sp, dc in last sp. Fasten off. If you see any errors, please let me know and happy crocheting! ⏰ Time Stamps 00:00 Intro 00:22 Measuring Guide 00:57 Pattern 01:32 Row 1 05:23 Row 2 08:16 Straighten Edge 08:20 Side 10:22 Valley 14:25 Border 15:00 Link to Video FInd me on Insta : @playhookywithme
🎬 More from Play Hooky with Me
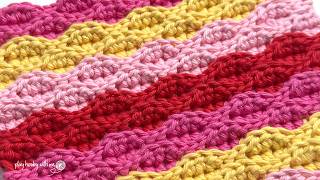
This Stitch Feels as Good as It Looks
2.1K views
Three Granny Triangles Every Crocheter Should Know
2.6K views
The Easiest Crochet Flower Scrubbies 🌸
2.7K views
My Favorite Crochet Color Change Tricks 🤩
16.4K views
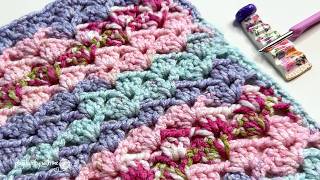
Learn This Relaxing One Row Repeat in 6 Minutes 🧶
23.8K views
How to Knook in the round + Easy Increases & Decreases 🌟
2.9K views