
Is this your channel?
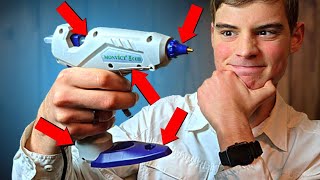
Hot Glue Gun
Hot glue is basically the backbone of this entire sword build. I used long beads on the high setting for structural seams, and then dropped to a lower setting when I was wrapping and decorating the handle so I didn’t burn my fingers.
Buy on Amazon
You'll be taken to Amazon to complete your purchase.
Pros
- +Fast structural bonding for cardboard
- +High setting helps with long seams and strong joints
Cons
- -Glue can cool too fast during long crimps
- -Easy to burn your fingers if you’re not careful
What Maker Brain says
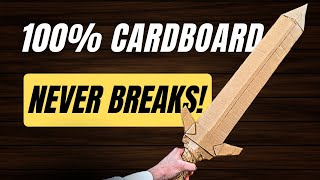
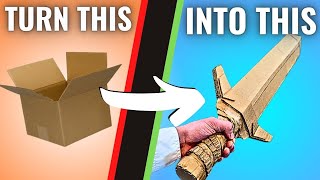
“this incredibly strong cardboard sword is made completely out of just cardboard and hot glue without any expensive wooden or metal rods stuck through it or fancy hardeners applied to make it stronger and in this video you're going to learn exactly how you can make one just like it and if you stick around to the end of the video I'll share with you a complete cardboard crafting action plan which I think you'll love I started out with this huge piece of cardboard that I had found and I wanted the blade to be about 34 in long so so I measured it out and from there I uh drew the cuts that I wanted to make unfortunately the cardboard that I had did have a slit through half of the cardboard partway down and I had to glue through that and add a piece of construction paper over top of it to hopefully reinforce it right there once I had the two side pieces for the core cut out I made sure that they had slots for the handle and then there's another piece going up through it making a plus shape which gives us some structural Integrity in both directions but I want to you know that it's super useful to have a large cutting mat like the one hanging on the wall behind me uh and you can also see in almost all the shots for this cardboard sword from here I had just the base of the cardboard sword and I used that by slowly rotating it over the cardboard from one Edge to the other and that gave me a rough estimate for how much cardboard I would need you'll notice that there's an extra line on this cardboard piece because I added about an inch to the width of my cardboard so that I would have enough to cover the uh edges once I went through and you'll notice that on this cardboard piece the corrugation is going way the long ways up and down which is different from the way it goes in the core now this difference in corrugation angle will help improve the strength of the sword from here I marked out the center for this piece I was fortunate enough to have the center line be right above one of the corrugations and that was just totally awesome so I could cut through one layer of the cardboard Now using a mini exacto knife and then use the back of the xacto knife to sort of crunch it in and that gives me a little bit easier fold from here I took my hot glue gun and put it on the high setting and put a bead of hot glue all the way down the cardboard blade from there I could fold it in just a little bit once I had this piece down I sized it up on my core and discovered that it was way too long so I trimmed a little bit off of each side from there I copy this piece onto another piece of cardboard so that I could have two of the exact same thing you'll notice a few Dimensions here on my cardboard but uh these are more just relative and I doubt your cardboard sword will ever actually fit these Dimensions perfectly because there's so many variables in building this once I had the two pieces of cardboard with the corrugation going the long way I sized them up one more time on the core of my cardboard and it looked like it was going to fit great so I traced out the core handle shape onto this cardboard and made these cuts inside of it so that I could have a fold and now I had to go for some really long hot glue streaks down the core to glue the core into the blade now the problem here is that sometimes you run out of that glue stick and I was only using 4in glue sticks here so in order to get these long gluings I glued a little bit onto the end of the glue stick and then pressed it back into the hot glue gun to basically extend the glue stick and make it really long so I wouldn't have to worry with changing glue sticks halfway through the bead so what we have here is I've already just done one layer around the outside uh with the joints on the edges and it's already plenty strong enough to swing around and even chop through like a zucchini and a banana but now I really want to see how far we can take this so it performs as well as possible during our durability test at the end of the video so I have these large sheets that I cut out while I was just on my floor cuz the cardboard was so big I couldn't fit it on my desk and I did the same thing as before where I used the blade and rotated over a little bit for reference to get a good size and then once I had that down I would trim it any more that I needed and then copy it into another piece these pieces have to be very angled to make the blade and you can see that when I'm just holding it it's already really strong cuz it's folded like that so much stronger than if it was just a straight piece of cardboard but what happened is one of the pieces that I cut out had a big Ridge in the middle and this wasn't going to work if I was going to fold the cardboard cuz it give me a weird look and it would be hard to fold so I cut that Ridge out and then seamed two pieces of cardboard together I added glue on the inside of both pieces and jammed it together and then I just put a piece of card stock on the back and that created a really strong cardboard connection that was able to hold itself out straight once I had this next cardboard piece at the right size I was sure to score along the inside and make sure that that card stock was on the inside cuz it would look really weird on on the outside this next part I needed to go super fast I turn my glue gun to the high setting once again and put a bead down the entire center of the uh fold and this fold needs to be really sharp because it's the blade of our sword from there I wanted to crimp it just like I did to my test to make a strong blade but before I even got halfway down my Blade the co glue on the inside had cooled because crimping it took so long with those pliers in this case I got my heat gun out and heated the cardboard back up and crimped the rest of the way down I tried a different method on my next piece of cardboard where I glued small segments at a time and really just jammed the tip of the glue gun down in there to get the glue all the way inside the fold this point I also had to make cutouts for the handle with a zigzag pattern I went down and covered the new core in hot glue and glued the pieces together now we had basically the finished blade and handle we just don't have the tip or cross guard or anything but it didn't look very nice there was this big gap down the rib rib in the middle so in the spirit of using only cardboard I painstakingly tore one side of a cardboard piece off one of these long cut offs that I had from uh making the blade and glued that over the entire middle like a piece of construction paper the color matched perfectly so it's really hard to tell it's even there next up I had to build the cross guard and this one really ended up varying from what I had in the drawings but I ended up cutting out four pieces of uh cross guard that we can glue all together the reason I didn't integrate the tip into the pieces of the blade which would have been the strongest solution is because that all cutting out all of those angles and making it work together would have been a lot of work and I don't anticipate smacking anything super hard with the very point of the sword and in order to get a tip that actually fit onto the blade I had to really just cut it and refit it and cut it and refit it and cut it and refit it and then trash the piece cuz I cut it too small and then cut it and refit it eventually I got a piece that fit and for the corrugation on these I had it going straight up towards the point what this is going to do is once it's folded and tilted slightly to make that tip the corrugation going at a slight angle and I feel like that's going to make it really strong our handle felt pretty strong but now with all of these layers of cardboard way up on it the sword was actually getting pretty heavy and I was afraid this handle might not be able to handle it so I took two little ink squares of cardboard and folded them to make them into triangles then I took those triangles and glued them on to the bottom of the Cross Guard from there I wanted to decorate the handle in a little bit of an unusual way I had made so many long little cut off pieces when I was trimming my things for the blade I took these and ripped most of them in half and then glued them in a spiral around the handle this spiral gave it a more natural like cloth type or earthy wrapped look which was pretty cool now when you're doing something like this you want to make sure the glue gun is on a lower setting so you don't burn your your fingers holding all of these down now I think this is the strongest cardboard sword on all of YouTube if you think you have a stronger cardboard sword leave the link in the description below and we will duke it out starting off today we have our easiest contestant the banana Smash It Cuts right through the banana with a clean break the banana in its Vengeance leaves a wet Mark along the sword which could cause future damage as it soaks into the blade the blade comes up the blade comes down boom celery is parted in a shocking array of power next up we have what is a real cucumber and not a zucchini boom Oh and the sword Cuts right through the Cucumber look at that damage as it's broken now this might not be your kitchen knife but it does get through with its immense weight and power behind the blade it basically crushes its way through the Cucumber lastly we have the crispy and hard apple uh apples are definitely a challenge to cut through so the blade comes up Eli was not sure if he would be able to cut this but with an astounding array of precision and power the apple is split straight down the center like a axe is able to split a log the blade barely even had to travel the whole way through before the shock split that apple in half with a pretty clean break all right fruit was no longer enough and we progressed to Wood this right here is a three e inch piece of pine board these boards are professionally used by martial artists when they do breaks with their hands and this is one of the lighter weight boards however in this instance we are cutting it against the grain and this small section is going to be a challenge in our first trial we break straight through the board and it stops as it hits the table so we add more spacing and upgrade the board to a half in board the blade comes up and it's coming back down on top of the half-in board will we see the end of the sword the sword takes heavy damage as a large Notch is left in the side of the sword right where it tried to smash through the cardboard but you will notice that that crimped and glue hardened Edge left a dent along our Pine board”
Featured in 4 videos
How to Make a Cardboard Sword! (So Strong It Can Break Wood!)
20K views · 2024-02-24 14:19:25

New Hot Glue Gun? 3 Things You Must Know Before Using it! (and Avoid Clogging)
30K views · 2023-04-27 13:00:16
How to make The Strongest DIY Sword on YouTube! (No Special Materials Needed)
8K views · 2023-04-06 13:00:10
This $17 Hot Glue Gun Won't Drip (and it is almost Perfect)
4K views · 2023-03-05 23:00:58