Is this your channel?
Transfer Tape
Transfer Tape
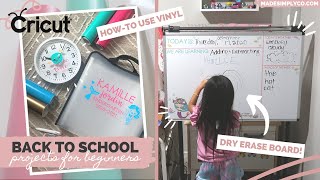
Transfer tape is what makes these vinyl projects feel beginner-friendly, because it turns your cut design into a transferable sticker. I use it with a scraper tool so everything sticks evenly before I place it on my organizer, clock, or whiteboard.
Buy on Shrsl
You'll be taken to Shrsl to complete your purchase.
Pros
- +Makes moving vinyl designs easy and clean
- +Helps keep lettering aligned when applying
- +Works well with scraper for smooth adhesion
Cons
- -You need to cut it to size for each design
What Life Made Simply with Nikki says
“com for all the projects and be sure to follow cricut and visit their website for more of the materials that you will need i'm so excited to share these diy projects with you so without further ado let's get crafting these diys are great if your kids are in school distance learning or in a hybrid model you can also customize to whatever colors and theme of your choice in times like these i think it's fun to be creative and really embrace this time to try something new in these projects i'm using vinyl by cricut and a great product i wanted to mention is the vinyl starter pack which comes with eight sheets a weeding tool and a scraper you can use regular vinyl glitter permanent removable printed or even premium vinyl the cricut has so many options and this kit is perfect for beginners and you get all of the tools you need i've had this paper organizer for my daughter's last school year and wanted to customize it for this year it's perfect for organizing and sorting through worksheets artwork and other school related paperwork i started off by measuring how large i wanted the graphic on the front and chose which colors to use we are doing a mermaid theme because my daughter is so into mermaids right now i did a cute font and some mermaid graphics in cricut design space and a trick is by combining two graphics you can weld them and it creates one cut this creates two separate cuts for two different color mats which is what i wanted to do [Music] you want to load your mat with the vinyl side up and load it into your cricut machine be sure that there is enough room behind your machine for it to run through choose your material on design space and you're ready to start cutting so creating vinyl stickers is easily my favorite quick project to do on my cricut maker i can design and create new projects in minutes with just a few materials [Music] after that's done i load my second vinyl color onto the mat and it's ready to cut [Music] next you want to cut out the portion of the vinyl that you designed on and start weeding the negative areas this is where the weeding tool comes in handy and this on my cricut makes it so easy to do when complete you'll want to cut out a similar size of transfer tape peel it off and stick it onto your design i like to use the scraper tool and now you have a transferable sticker now it's time to see where you want to place it on your folder i like to put the text in the middle and then i cut out the two graphics separately so i can play with them a little bit i later found out that the material of this folder wasn't the best surface for stickers but i made it work you can also use this on plastic such as a plastic file holder bin binders a folder or even pencil cases with these final stickers [Music] overall i loved how this came out it's colorful and fun and will help me stay organized for the upcoming school year on to our next diy taking a plain four dollar wall clock and some vinyl and we are creating a fun clock to help you stay on schedule with qriket design access you'll have access to over 100 000 cricut images hundreds of fonts and exclusive savings on accessories and materials check out the description box for more information if you want to sign up it's as low as 7”
“99 a month if you sign up annually i found this adorable mermaid image which i thought would look great in the center of the clock and you can add your own custom font it's easy to do and there's so many fonts to play with you can also adjust the letter and line spacing to get it just how you want it to look i separated this into two different mats for two different colors and i also had my little helper help me load the mat and start the cricut maker machine [Music] at any age getting your kids involved in creative projects can really spark their own creativity even if it's just helping by pressing some buttons [Music] repeat the same process with weeding and applying the transfer tape and before you know it you have a sticker [Music] be sure you're applying your sticker onto a clean and dry surface i centered the mermaid image on the clock and decided to layer the pecs over it i love how the colors came out on this one the pink and green give it real mermaid vibes my daughter had some extra stickers with bubbles and fishies on it so she wanted to add it to her clock this was such a fun project and she loved how it turned out [Music] this next one has to be my favorite i got this idea from a friend of mine and got more inspiration from pinterest taking a plain whiteboard i mapped out the sections i needed i used the ruler to measure how big i wanted the different sections and then i used some thin washi tape to outline them washi tape is super forgiving when you need to make adjustments and comes in lots of colors and patterns you can also use a ruler to help guide you in making straight lines camille helped me by adding her own fun mermaid stickers to the board it really helps fill up some space and goes with the theme i continue the mermaid vibes with pink green and gold and now on to designing the titles this is my favorite yet fun easy to read fonts and i typed out the titles and separated them into two sheet colors by welding them together i learned that you can also add color to the text and images right in design space you can visually see how they'll look [Music] follow the same steps in weeding the sticker and adding the transfer tape it is just so easy once you get it down you'll be wanting to make vinyl stickers all day [Music] now it's time to stick them to your board you can easily customize this to whatever sections you need or even create a large calendar there are so many possibilities let me know in the comments what you would create with your whiteboard and what you would use it for i love adding this little inspirational quote because it just helps encourage us when times get tough and we know that virtual learning isn't always easy here is the hack that turns your white board into a rolling one all you need is a rolling clothing rack and some zip ties this white board already had holes in the corners and you can also drill your own if yours doesn't have any simply secure the zip ties onto each end and i just love this hack so much it's so easy and it's more affordable than the ones that you can find online you can also adjust the height of the board and secure it into place if you need to add a felt pad to cushion the back where it hits the pole my white board also came with a tray for pens and it really completes this whole project okay open your eyes she was honestly so happy with it and i love that we can both use it for teaching and learning and it's like bringing the classroom home i can easily wheel it to and from different rooms and it fits perfectly right next to her desk if you're interested in a full tour of her school desk base please give this video a thumbs up and let me know in the comments if you subscribe to my blog at madesimplycode”