Is this your channel?
Premium Vinyl
Premium Vinyl
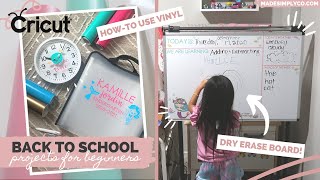
Cricut Premium Vinyl is what I used to create quick, colorful custom “stickers” for all three projects. Once it’s cut and weeded, it applies so smoothly with transfer tape and instantly upgrades basic school supplies on a budget.
Buy on Shrsl
You'll be taken to Shrsl to complete your purchase.
Pros
- +Cuts cleanly on the Cricut Maker
- +Great for fast custom labels and decals
- +Lots of vinyl options available (permanent, removable, glitter, etc.)
Cons
- -Some surfaces (like certain folder materials) don’t hold vinyl as well
What Life Made Simply with Nikki says
“com for all the projects and be sure to follow cricut and visit their website for more of the materials that you will need i'm so excited to share these diy projects with you so without further ado let's get crafting these diys are great if your kids are in school distance learning or in a hybrid model you can also customize to whatever colors and theme of your choice in times like these i think it's fun to be creative and really embrace this time to try something new in these projects i'm using vinyl by cricut and a great product i wanted to mention is the vinyl starter pack which comes with eight sheets a weeding tool and a scraper you can use regular vinyl glitter permanent removable printed or even premium vinyl the cricut has so many options and this kit is perfect for beginners and you get all of the tools you need i've had this paper organizer for my daughter's last school year and wanted to customize it for this year it's perfect for organizing and sorting through worksheets artwork and other school related paperwork i started off by measuring how large i wanted the graphic on the front and chose which colors to use we are doing a mermaid theme because my daughter is so into mermaids right now i did a cute font and some mermaid graphics in cricut design space and a trick is by combining two graphics you can weld them and it creates one cut this creates two separate cuts for two different color mats which is what i wanted to do [Music] you want to load your mat with the vinyl side up and load it into your cricut machine be sure that there is enough room behind your machine for it to run through choose your material on design space and you're ready to start cutting so creating vinyl stickers is easily my favorite quick project to do on my cricut maker i can design and create new projects in minutes with just a few materials [Music] after that's done i load my second vinyl color onto the mat and it's ready to cut [Music] next you want to cut out the portion of the vinyl that you designed on and start weeding the negative areas this is where the weeding tool comes in handy and this on my cricut makes it so easy to do when complete you'll want to cut out a similar size of transfer tape peel it off and stick it onto your design i like to use the scraper tool and now you have a transferable sticker now it's time to see where you want to place it on your folder i like to put the text in the middle and then i cut out the two graphics separately so i can play with them a little bit i later found out that the material of this folder wasn't the best surface for stickers but i made it work you can also use this on plastic such as a plastic file holder bin binders a folder or even pencil cases with these final stickers [Music] overall i loved how this came out it's colorful and fun and will help me stay organized for the upcoming school year on to our next diy taking a plain four dollar wall clock and some vinyl and we are creating a fun clock to help you stay on schedule with qriket design access you'll have access to over 100 000 cricut images hundreds of fonts and exclusive savings on accessories and materials check out the description box for more information if you want to sign up it's as low as 7”