
Is this your channel?
here
here
I mention the Apex Jump Drive because it’s a really interesting bit of drivetrain kit and people keep asking how it actually goes together. In this video I install a pair and show the key details—paired gears, the mount differences, and the bearing/retainer bits—then ride it so you can hear what it’s like in practice.
Buy on Electricskateboarding
You'll be taken to Electricskateboarding to complete your purchase.
Pros
- +Clear, feature-rich gear drive design worth a proper walkthrough
- +Paired gear setup shown working during the install
- +Real-world noise example from a short test ride
Cons
- -More assembly steps than a basic drivetrain, so you need to follow the order carefully
- -Small parts (bearing/retainer stack) can be fiddly if you rush
What Lee Wright says
“hello guys welcome back to my channel my name's lee and i'm a diy electric skateboard builder and in today's video we're going to be talking all about the jump drive which is the second drivetrain that we are releasing at the same time the last video we did was about the chain drive and this video is about our gear drive which is called the jump drive now i was hoping to have this ready for when we released the gear drive um but unfortunately because of a few things like me catching covered and all that rubbish um it wasn't ready or i wasn't ready to even film it so i just concentrate on the chain once i've done most of the content for that already um and here we are with the gear drive so what is the jump drive well the jump drive is a super thin and lightweight steel helical gear drive which is packed full of features and tech we spent a long time developing this and with quite a few iterations and a lot of money as well to develop this and obviously now it's finally ready for release um the most striking feature about our gear drives other than them being really really small is the push fit adapter that we've launched this gear drive with this is a true push fit adapter with nothing that needs to go onto the wheels at all it's just a standard inflated fully inflated wheel can go on here and it supports three different hub types first of all it supports the nbs rockstar 2 which is what we ship our apex predator with it also supports the mbs 5 star and therefore 9 inch tyres as well on here and it does also support tramper fat lads as well if you are using these on our trucks uh all three of those wheels are supported although we do provide clamps also for tramper cnc trucks and if you're using these on a trampa cnc truck then only fat lads are supported and that's because they have shorter axles and we've got one here they have shorter axles than our um trucks so they therefore don't fit the mbs wheels you see like quite a lot not a lot of sorry of axel left sticking out there so fat lads go on on tramper trucks but on apex airs you can fit um all three of those wheels on and this adapter does support all three of those on one adapter so you can swap and change there's actually two different positions in here so this one these ones here are for the rockstar 2 and for the fat lads and then the ones in between with the bolts they fit the five stars they go in there as well so three different hubs on one different adapter two different uh clamp profiles like i've said to you apex air and tramper they fit 63 millimeter wide motors with eight millimeter shafts they have to have eight millimeter shafts and also um you can't have too much of a step on the axe on the motor shaft sorry um a ten millimeter step you can have too much of that so you have a couple of millimeters i think but ultimately these work really well with the motors that we sell which have been custom designed to work with the gear drive and with the chain drive and if you use our motors you get some extra features that you don't get on other motors including not having to glue the moat opinion to the shaft which is a game changer and also not also not cutting that shaft down and some other features that are immediately apparent are heatsink here for motor cooling this does work we've simulated this in fusion with thermal thermodynamics and it does does aid cooling in fact this whole thing is designed to to be a heat sink for your motor but those do actually increase the cooling potential of this gear drive we have like a motor adapter plate uh built in to the gear drive this holds a thrust bearing for the helical forces which when you're going forward are directed into that thrust bearing and it also allows us to do external um backlash adjustment and some people were a little bit confused about how that works is very very simple this plate bolts to your motor and then this plate is bolted to the gear drive and these four bolts here loosening them off will allow that plate to slide and that's how you can set the backlash without even opening the gear drive up at all it's really nice and there's some other cool features about this and which we'll go through as we go through the installation which is what this video is actually going to be showing you how to install these on apex as right now in front of me i have a board this is my um my gear drive board um it doesn't have a battery on it at the moment so i've only got one battery so i've put it on the change drive board in order to make the chain drive video but i've actually been driving riding the gear drive board more recently than the chains um i will put the battery back on and go out for a spin later but as you can see this board has the gear drives already installed so what i'm going to do is off camera i'm going to disassemble um these two drive trains and i'm going to come back to you with fresh you know nothing installed on the hangers and we will do an installation together and i'll show you how it goes because it is a little bit tricky i guess it's there's definitely more involved in normal gear drives and that's because there's things lots of different features on here so yeah give me a second i'll be back and we'll go from there one thing i will never ever get bored of is this quick swap wheel adapter it's absolutely insane i mean that's a fully inflated wheel guys and it just comes off like that never get bored of that actually just as i'm taking this apart another thing i really like about this gear drive is you can take the motor off and take it out of the gear drive there's so many gear drives where that's not possible you can only get the motor off if you take the gear off and yeah hours you can just now there's no grease on here because i actually this is um one of the one of the drives that we're going to be fitting today i threw it on the other day for the pictures so it's actually a brand new drive that one is one of the prototype ones but this one is a brand new one but yeah that's why you don't see any grease and the other thing i like is if you just undo these four bolts here and the whole gear drive slides off that's also really nice it's actually really quick to disassemble and get it off your hanger the other thing i like is the way we've done this adapter the motor is sort of the phase-wise are sort of angled so they're not into the truck and you know they're not sticking up you can actually have them they're sort of nicely tucked away um in here so we've done that on purpose it avoids the clamp but also gets it out the way because we like to run our motor phase wires sort of on top of the hanger and then in that way so yeah so there's one done i'm actually probably going to leave the clamp on um just because i don't need to take it off but we'll go through about all of this you can see there isn't much you don't need much hanger space to fit these drives um that's actually 24 millimeters so yeah not a lot um so yeah we've got one off i'm just going to get the other off and then i'll be back right then so i have a hanger here um which has has no drives installed anymore um it does still have the clamps on um i'm not going to take the clamps off for the video because they're already on they're already nice and tight working um so i'm just going to leave them on but we'll when we get to that i'll tell you all about that the first thing you're going to want to do is you're going to want to disassemble your gear drive um and actually look how bloody skinny this gear is it's ridiculous um you're going to want to disassemble the gear drive so you want to take off the adapter bolts which of which there are five and then you want to take off these bolts here um of which there are six and these ones on the corners here are longer than these so these are i can't remember maybe 16 millimeters and all of the rest of these bolts are all m410s so easy to identify but yeah we're gonna take this apart and i'll show you the inside all right bolts are out take the lid off and you can see the wheel gear and then that i forgot there was a spacer in there the wheel gear so um there's actually the case with the big main bearing on here and that is user serviceable if you want to take that off you can take that off um but obviously i'm not going to do that and here you can see the uh the wheel gear so we've got really thin face width gears here and these are 10 millimeter gears helical gears and the key to making this drive so light is um the fact that we have this aluminium hub that this gear connects to if this was all steel it'd be really heavy but obviously we've done that to minimize weight and it's one of the tricks to get this gear drive to be incredibly lightweight so with that that's it stripped down to its component parts so i'm just going to do that with the other drive as well and i'll be back in a sec now something really important i want to show you here i have both of my wheel gears out of the gearboxes and you'll notice that they are paired gears you see that that's very important because what that means is that these need to be installed on the correct side in order to get the side load forces the axial loads from the helicals into the thrust bearings in the forward direction now obviously we're not counteracting uh forces in reverse or when really heavy breaking um but what we've found is that you don't need to basically so it needs to be when you're accelerating hard so that's what we've done but it doesn't mean that these need to be in the correct order if you're building a four-wheel drive and you're putting these on the front they need to be in the reverse order from what the instructions say so i'm going to show you how to do it on the back and bear in mind if you're putting them on the front you need to reverse that order otherwise you'll have the forces going in the wrong direction so very important it's very clever but it does introduce a bit of a complication into the installation of the gear drive so that's why we strip both gear drives down get these out and we'll go from there right right so you've stripped the gear drives down to their component parts um one of the things you're gonna get is the clamps and you'll notice that there's like four sets of three holes and obviously that's gonna be for the bolt to go in to clamp the clamp to the gear drive casing and on the outside you've got double rows of grub screws now for the gear drive we're going to fill all of those holes up with grub screws and if you're doing the chain drive installation which we'll talk about in another video you actually only use adjace a pair of adjacent and grub grub screws but for the gear drive you need all eight grub screws installed in here now when you do this you're going to want to use loctite loctite 243 definitely important on the grub screws in fact every single bolt when you get these gear drives the only bolts that will have been loctited already is these ones because there's no need for you to remove them to install them so they will already be locked tightened in there's no need to do anything with those but every other bolt on this gear drive needs loctite 243 very important so you're going to put the grub screws in and you're going to slide the clamp onto the hanger um leave it loose for now don't tighten these grub screws there's not really any need to do that um because what we're going to do is we're going to put all of the other stuff on find the location of them and then we're going to tighten them down obviously like i said to you earlier i already have clamps installed on this hanger and it'll be silly for me to remove them just to reinstall them to show you so just imagine i've put them on and all of the grub screws are in lightly so this can still move next we need to talk about how this um the angle adjustment works basically um there's like i said to you there's there's four sets of three holes and what's going to happen when you slide this on um there's going to be one set of holes that lines up and as you move it six degrees it'll move to another set and then another set and then move it six degrees it goes back to the first set again and you're going to go all the way back through it um in the kit you've got these 24 millimeter bolts and they actually go in through the back of the clamp and stick out into the back casing of the gear drive and that's what's going to hold the gear drive to the clamp so when you've found the angle that you want you can take this whole assembly off including the clamps and you can tighten this up off the truck obviously because my clamps are on there i'm going to have to tighten it up on the truck but what we want to do lock tight and we're just going to stick these in through the back right now as i told you earlier these gears are paired so it's going to be really important that we get these on the right way around refer to the instructions um guys it's very important first thing we need to do is put the spacer on 10 millimeter space that you got on the kit and then the correct gear for your side like that now the next thing we're going to do is we are going to prep the motors you'll find your motor adapter this is the space for the thrust bearing and but first we need to attach these to the motors so we're going to go and do that now you'll see four screw holes they are the correspond to the adjusters on the outside here so this adapter goes sort of that way i hope i can explain that properly you'll see one two three four one two three four so that goes this way and it's going to slide that way so on our motor we know our motor is going to go in this way that means we need to secure this that way around m4 by eight millimeter bolts bit of loctite not loads on this you don't want it going into the motor right nice and tight and so you've got this arrangement now and in here is where the thrust bearing is going to go so you will receive two of these thrust bearings in your kit you've got the inner race and then you've got two of these outer outer bearing parts these are actually different sizes one of these will be snug on the motor shaft and one will be a bit looser and what you want to do is you want to put the one that's slightly loose first and then the inner race goes in but before we do that you're going to want to put some grease on this bearing we use red and tacky you can use whatever you want incidentally ben penn does this he uses a syringe to put that on i'll drop a picture in right now the snug outer part of the bearing then you're going to get your motor key which comes in the kit the ones for the production are going to be longer than that um as this one's a little bit short and then from your kit depending on what ratio you went for depends on what size gear you're going to get find the one that matches your wheel gear and stick it over the top now if you have apex motors you'll notice there's a circlip retaining section on the shaft so we're gonna we're gonna attach this motor with a circle if you don't have apex motors and you're going to have to use loctite 638 to glue that on or 648 whichever you prefer 638 probably better in this application but i do have apex motors of course so i'm going to be retaining mine with a circlip and there we go that is a fully retained motor pinion on the motor and that circlip is not coming off obviously is part of the service interval to change that every so often but it will last for a long long time and that's it fully attached no glue at all obviously you're going to need to do that to both sides once that's done we need to make sure that we've tightened down the grub screws on the clamp here so that this clamp is going nowhere we need to make sure the inner face of this back plate is right up against the hanger you can if you wanted to you could attach the motor adapter back on you could so the wheel adapter you could put a wheel on you could put a nut on to make sure everything's across and then you can um you can tighten up the grub screws at the back of the plate on the on the clamp make sure you do these tight and make sure you use a proper driver proper hex driver don't round them out and you can't do them up to infinity talk obviously they'll only go so far and then they'll strip so be careful but make sure they're tight um all the way around do them in opposite pairs so what i do is i tighten them down a little bit so that they're all snug then i go around and tighten them a bit more opposites and then i go around and do like a final tighten on all of them right once that's done you can stick your motor assembly in right one of the things that people are confused about when we launch these is how the external backlash setting works look so that's your normal backlash adjustment and it doesn't matter whether the case is on or not you can still adjust it so you can actually set this you can hold the the adapter the wheel adapter and get your backlash setting right without opening the drive so um obviously first time we're going to do this we're going to do it with it open so what we're actually looking for here guys is we're looking for the smallest the smallest movement possible between the two gears that's about right actually tighten this down nice yeah that little click clack click click click click perfect right now that's done wheel gear out let's get it greased bit of a tip for you when you grease the gear just fill in all the teeth with grease that's plenty do that all the way around right that is that's plenty slot that back on there we go and if you're wondering what my prototype set looks like after all the miles i've done it's still very very clean and uh okay with that all greased up um the inside work is complete all we've got to do now is put the lid back on which we'll do i'm going to get some grease spurt out but don't worry about that put the bolts on the wheel adapter needs to go on as well and the bolts for that and then we're done don't forget those longer 16 millimeter bolts go in these corners and that's it guys this is installed we're just going to wipe away any excess grease that's squished out when we put the case lid on and that is it didn't take long at all that's probably an hour and a quarter um and i was filming so i think it's reasonable you can install these in an hour if you're reasonably competent at this sort of stuff um that is it wheels back on way along all the way tight and then back it off a touch okay check your backlash if it's wrong like one of mine is here it's too tight well we can adjust that externally can't we we'll back off we're back on to check the backlash before we tighten everything up perfect god you imagine having to take the drive apart to do that [Applause] sounds good right i guess you want to know what they sound like so let's get a battery installed um and we'll go out for a ride every time i need to go every time i need to know please i don't want to win the world [Applause] [Applause] so [Applause] so [Applause] you”
Featured in 4 videos
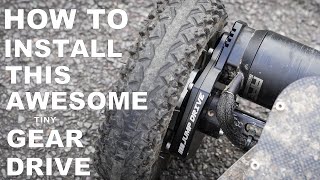
Apex Jump Drive - Installation How To
5K views · 2022-07-04 18:00:27
The Sequre SQ A110 Soldering Iron - Cheap and Cheerful!
2K views · 2021-11-29 19:00:12

Flipsky 4 2 Smart ESC Reviewed - 50A continuous Smart ESC (+ GIVEAWAY!)
4K views · 2021-11-08 19:00:12

FLIPSKY FS-SW1 Battery Lithium-Ion Spot Welder Review
11K views · 2020-12-14 19:00:01