
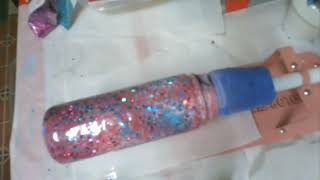
Glitter Tumbler using Tack It Method Tutorial - Part 1 Bubble Gum Pink
🛍️ Products Mentioned (5)
Amazon Link for the Tumbler Turner I used in this video.
Amazon Link for the Ailene's Tack It Over and Over
Please make a stop by my Etsy Shop at
If you would like to make a PayPal donation to help offset the cost of art supplies and resin. Here's the link to do that. All donations go right back into art supplies so I can keep making videos.
I am an Amazon Affiliate and my received a small commission for qualifying purchases made through my link.
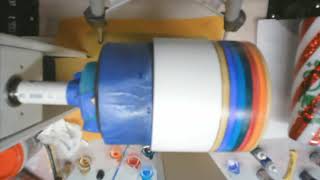
This is Part 1 Tutorial on How to make a Glitter Tumbler using the Tack Method with Ailene's Tack It Over and Over. I am using an old stainless steel cup of mine own and I wanted it to be brilliant pink so I chose Bubble Gum Pink Glitter. Step 1: Start with a clean cup and if it needs sanding as this one did I used 80 grit sandpaper to knock off and smooth out any rough areas. Clean the cup after sanding by wiping down with alcohol. I cleaned mine twice as there was a fair amount of sanding debris on the surface. Step 2: Using a matte spray paint apply a couple layers until you no longer can see the metal. Allow to dry. Step 3: Mix the Tack It with water with a ratio of 1:1. Step 4: Apply the Tack It mixture to the surface of the tumbler with a brush making sure to give a good coat. Step 5: Wipe the excess from your brush on the edge of your cup of Tack It mixture and take the brush and smooth out the Tack It mixture on the cup until you no longer see any streaks. Allow Tumbler to sit approximately 5 minutes until the Tack It is tacky but not wet. You can add a second coat of the Tack It mixture to ensure you have good coverage. Step 6: Start sprinkling the Glitter all over the entire surface of your tumbler and allow the excess to fall onto a clean sheet of paper. Tap the cup to remove any excess that does not fall off on its own. Pour the loose Glitter back into the package it came in. Step 7: Using your finger(s) gentle rub the glitter into the Tack It as if burnishing the surface. There will be excess Glitter that again falls off. You can save this in a separate container so as not to contaminate the Glitter still in your package. The next steps will be in Part 2 Video of this Glitter Tumbler Tutorial. Please stay tuned for the video. Amazon Link for the Tumbler Turner I used in this video. https://amzn.to/2JiJPLS Amazon Link for the Ailene's Tack It Over and Over https://amzn.to/2WcRfVX I am an Amazon Affiliate. If you purchase through my links provided in this video, I may receive a small commission from Amazon at no additional cost to you for your purchase. This helps me to continue to bring quality how to videos for my subscribers. I do not own the copyrights to the Graphics Intro/Outro used in this video. All rights belong to (cc) Videvo.net Music Credits: Dr. Turtle "The Ants Built a City on His Chest" All of my art work is available for purchase. If you are interested in purchasing the piece in this video you can contact me at: kreative.escapades@gmail.com Please make a stop by my Etsy Shop at: https://etsy.com/shop/kreativeescapades To contact me: https://instagram.com/kreative.escapades https://facebook.com/Kreative.Escapades If you would like to make a PayPal donation to help offset the cost of art supplies and resin. Here's the link to do that. All donations go right back into art supplies so I can keep making videos. https://paypal.me/kreativeescapades Amazon Disclaimer: I am an Amazon Affiliate and my received a small commission for qualifying purchases made through my link. https://amzn.to/32JOPRp If you haven't subscribed to my channel yet, please hit that subscribe button, if you ring the bell you will be notified of future videos when I upload them. Click 'Like' and 'Share' this video, if you have any questions or comments regarding this video please leave them below. I love reading your feedback and I will respond to you. If you have an idea of suggestion of future paintings / projects you would like to see, please let me know. Thanks for watch!! DISCLAIMER: Always use protective precautions when using any paints, resins or any other chemicals, tools, or embellishments that you may see in my video. Some materials may be harmful if inhaled or comes in contact with skin. Use of gloves and respirator and well ventilated areas are highly recommended. #HowToGlitterTumblers #AcrylicFluidArtist, #ResinArtist #KreativeEscapades
🎬 More from Kreative Escapades by Kim Bevill
Dawn Dish Soap Power Wash Method Valentine's 3D Stainless Steel Flip Top Water Bottle
307 views

Come meet Sami, the sweetest little Yorkie Poo ever! Watch me make a Toy Gym for our little man.
443 views
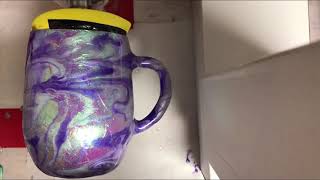
Opal Effect Using Cellophane and Tack It Method - (Full Video) OPAL SWIRL COFFEE RESIN TUMBLER
515 views
Power Wash Dawn Dish Soap Method - Storyboard Tumbler Glow in the Dark Dinosaur
508 views
How to get perfect straight line on Tumbler for Sherpa Design w/o using tape Easy Beginners Tutorial
1.3K views
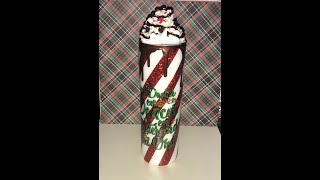
DIY Faux Whipped Cream Topper Candy Cane Tumbler with Chocolate Drips and Glitter Waterslide Decal
5.3K views