
Rust retro chat App – A Custom TUI Chat with Client & Server (Cursive Library)
🛍️ Products Mentioned (2)
Introducing Retro Chat, a custom Terminal User Interface (TUI) chat application built entirely in Rust! ⚡ This project features both client and server implementations, allowing seamless real-time communication over a network. Designed with a retro aesthetic, it brings back the old-school chatroom vibes with modern Rust performance! 🦀 Key Features: ✅ Built with Rust – High performance & memory safety ✅ TUI Interface – Classic, terminal-based chat experience ✅ Client-Server Model – Supports multiple users ✅ Real-time Messaging – Fast, efficient, and lightweight ✅ Connection Logs – Monitor user activity easily Rut Book: https://doc.rust-lang.org/book/ch03-01-variables-and-mutability.html Rust Full Course: https://www.youtube.com/watch?v=rQ_J9WH6CGk&t=11s GitHub Repo: https://github.com/BekBrace/rust-retro-chat Timestamps: 0:00 - Introduction and thanking viewers for support. 0:26 - Apology for sound quality issues during the server file creation. 1:17 - Introduction to creating a retro chat application in Rust. 1:40 - Starting with the server file and creating a new project using cargo new. 2:14 - Adding dependencies in Cargo.toml (Cursive, Tokio, Serde, Chrono). 3:02 - Explanation of serialization and deserialization using Serde. 4:07 - Creating the server file and importing necessary libraries (Tokio, TCP listener, etc.). 5:08 - Explanation of asynchronous runtime using Tokio. 6:03 - Transforming the main function from synchronous to asynchronous using Tokio. 7:02 - Setting up TCP listener and broadcast channels for message distribution. 8:02 - Explanation of buffered reading and writing for efficient I/O operations. 10:05 - Defining the ChatMessage struct and MessageType enum. 13:45 - Creating the ChatMessage struct with fields: username, content, timestamp, and message type. 15:15 - Defining the MessageType enum for user messages and system notifications. 16:01 - Explanation of Tokio and its role in asynchronous programming. 19:03 - Setting up the main server loop to handle incoming connections. 22:02 - Creating a broadcast channel for message distribution. 23:10 - Accepting new connections and displaying connection information. 25:27 - Spawning a new task to handle each connection asynchronously. 26:29 - Creating the handle_connection function to manage individual client connections. 29:04 - Reading the username sent by the client and cleaning it. 31:35 - Sending a system notification when a user joins the chat. 33:38 - Serializing the join message to JSON format. 35:09 - Broadcasting the join message to all connected clients. 36:13 - Running the server and checking for errors. 38:14 - Handling incoming messages from clients and broadcasting them. 40:29 - Handling incoming broadcasts and sending them to the client. 43:34 - Sending a system notification when a user leaves the chat. 44:35 - Logging disconnection information to the console. 45:28 - Invoking the handle_connection function inside the server loop. 46:28 - Running the server and confirming it works without errors. 47:46 - Introduction to creating the client side of the application. 48:11 - Importing modules from the Cursive library for UI development. 50:01 - Setting up the main function and creating a custom retro theme. 52:16 - Fetching the username from command line arguments. 54:47 - Initializing the Cursive UI framework and applying the retro theme. 55:55 - Creating a header to display the chat title and username. 58:29 - Creating a message area with a scrollable text view. 1:01:02 - Creating an input area for typing messages. 1:02:29 - Creating help text for user commands (e.g., /clear, /quit). 1:03:40 - Assembling the main layout with header, messages, and input areas. 1:07:02 - Adding global key bindings for quitting and inserting commands. 1:08:13 - Establishing a connection to the chat server. 1:10:06 - Splitting the stream into reader and writer for handling messages. 1:12:26 - Sending the username to the server and handling incoming messages. 1:14:52 - Spawning an asynchronous task to handle incoming messages from other users. 1:17:20 - Running the client and testing the connection with the server. 1:18:52 - Handling user input and sending messages to the server. 1:20:11 - Adding functionality for commands like /help, /clear, and /quit. 1:22:01 - Finalizing the client setup and running the application. 1:38:36 - Running the server and multiple clients to test the chat application. 1:39:10 - Testing user interactions, sending messages, and using commands. 1:40:47 - Testing user disconnection and system notifications. 1:41:08 - Testing the /clear and /quit commands. 1:41:25 - Final demonstration of the chat application working as expected. 1:41:31 - Thanking viewers for watching and encouraging comments and questions. 1:41:36 - Closing remarks and farewell.
🎬 More from BekBrace

My message for today ! #positivevibes #positivity #code
119 views
C# Programming Crash Course (dotnet-script)
731 views

Code your first Pascal Program | #pascal #programming
456 views
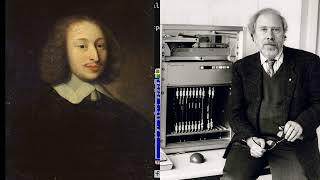
Pascal Programming
996 views
Monads in Haskell | with Functors & Applicatives | #haskell #programming
1.5K views
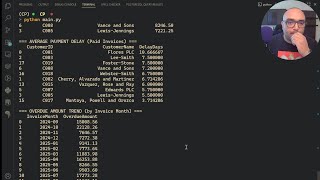
Real life AR Business Tool - Customer Payment Analysis Program in Python #python #pythonprogramming
460 views