
Photoshop Space Compositing Tutorial - Photoshop Manipulation
🛍️ Products Mentioned (10)
Graphics Tablet (Standard)
Graphics Tablet (Pro)
Keyboard
Mouse
Headset
MacBook Pro
Ergonomic Chair
Lightroom Channel
Tumblr
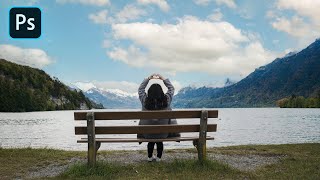
Today’s photoshop tutorial will demonstrate how to composite 4 images into one. This photoshop tutorial will include the following tools, layering, blend modes screen, opacity, hue saturation adjustment layer, black and white adjustment layer, brightness contrast adjustment layer, layer masks, blend modes screen, overlay and lighten, gradient map adjustment layer, curves adjustment layer, brush tools, quick selection tools, clipping, paint fill tool, free transform and free transform warp. Social Media IG: https://www.instagram.com/photoshoping_tutorials/ FB: https://www.facebook.com/AnthonyLamPhotography Twitter: https://twitter.com/PhotoshopEdit_ Tumblr: https://photoshop-edits.tumblr.com/ Pinterest: https://www.pinterest.com.au/PhotoshopEdits_/ —————————————————————- Check Out My Lightroom Youtube Channel - (Lightroom Is basically Photoshop Camera Raw) Lightroom Channel ➡️ https://bit.ly/2QItuX7 Lightroom Fb Group ➡️ https://www.facebook.com/groups/123263719767242 —————————————————————- My Equipment / Setup ➡️ Graphics Tablet (Standard) - https://amzn.to/3AIPrIB Graphics Tablet (Pro) - https://amzn.to/3g64jXU Keyboard - https://amzn.to/3AIPXGx Mouse - https://amzn.to/3AI36jc Headset - https://amzn.to/3r70yrI MacBook Pro - https://amzn.to/34gaG8w Ergonomic Chair - https://amzn.to/3AFiiNY —————————————————————- Thanks for watching please leave a like and subscribe and also comment below if you have any questions thank you Steps, Select a light grey color and fill your blank layer with the paint fill tool, or cmd + backspace or alt+ backspace depending on what Operating system you are using, next drag select a piece of the desert image with a rectangle marquee tool, use the hand move tool to click and drag your image over, press cmd or ctrl + T to free transform your image resize the image and then repeat the same steps for your sky once done create a curves adjustment layer and clip it reduce the darkness by pulling the middle slider down slight, next create a black & white adjustment layer and clip it change the blend mode to screen. Now click on your sky and add a hue/saturation layer and reduce the blues and cyans saturation. Drag the moon image to above your sky and change it’s blend mode to screen cmd or ctrl + t to free transform the moon into position once done create a layer mask and remove the bottom bit next step add a gradient map click the bar and make sure your gradient map is foreground to background click the little square box and select a blue color leave the other rectangle white change the blend mode to soften light and now create a new layer adjust your brush size to the size of the moon select the color white and click once change the blend mode to overlay now add hue saturation layer again and reduce the blue and cyans saturation. drag the 4th image over and cmd + ctrl + T to resize add a brightness contrast adjustment layer and clip it reduce the brightness and contrast so the image darkens create a layer mask and with the color black paint over any part the image you want to brighten next add a new layer select the color black and click once press cmd or ctrl + T to free transform it below the image this will act as a shadow.
🎬 More from Anthony Lam
How To Animate Clouds Using Photoshop
7.4K views
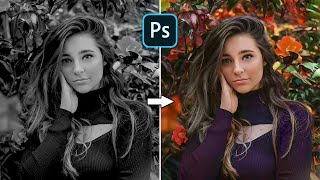
Restore Black And White Photos With This Amazing Website
7.1K views
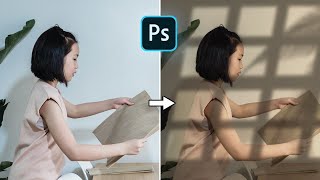
Window Light Effect | Photoshop 2023 Tutorial
4.3K views
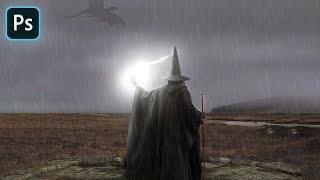
Wizard Vs Dragon | Photoshop Manipulation Artwork 2022
1.9K views

Create Realistic Reflective Puddles | Photoshop 2022 Tutorial
10.8K views
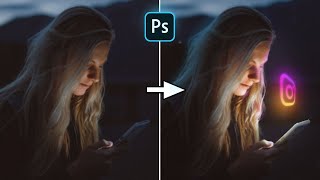
Photoshop | How To Create 3D Glowing Social Media Icons
3.4K views